

Jira Cloud: IT Asset and Service Configuration Management
Optimizing IT operations and minimizing inefficiencies hinges on effective IT Asset and Service Configuration Management. From hardware to software and service dependencies, Jira Service Management‘s (JSM) Assets function streamlines these processes, empowering your teams to work smarter.
Understanding IT Asset and Service Configuration Management
IT Asset Management (ITAM)
ITAM ensures that your organization’s assets are tracked, maintained, and utilized efficiently. From laptops to software licenses, ITAM answers questions like:
- What assets do we own?
- Are they being used effectively?
- How do we manage the lifecycle of these assets?
Service Configuration Management
Service configuration management focuses on understanding and managing the relationships between configuration items (CIs) that support your business services. This includes creating a service map that documents the following:
- Which services are critical to your business
- How they are deployed and interconnected
- Who manages them
Assets in Jira Service Management: The All-in-One Tool
Jira Service Management includes a native tool, Assets, for asset and configuration management. This is only available in JSM’s Premium or Enterprise plans. This Assets setup allows teams to:
- Build a repository of assets and CIs.
- Link these to service requests, incidents, problems, and changes.
- Track relationships and dependencies.
Key Features of Assets:
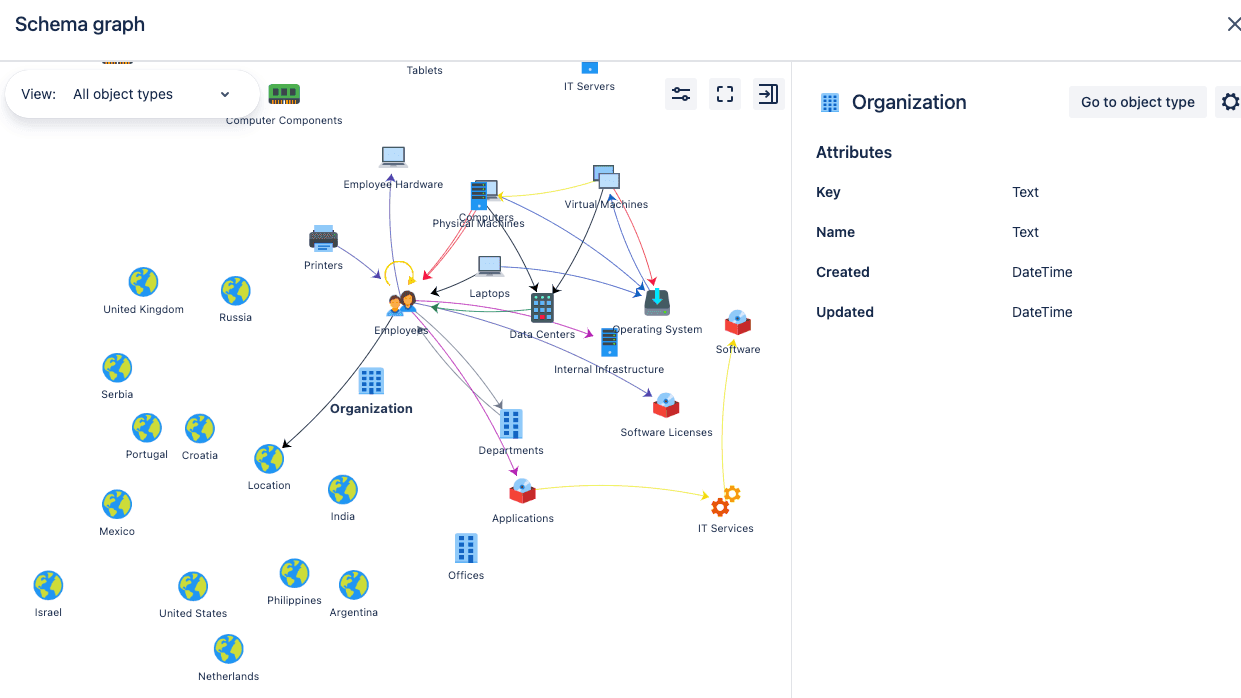
- Object Schema: Define and organize your assets and CIs with schemas.
- Templates: Kickstart your setup with pre-defined templates for ITAM, Users, Datacenters, etc.
- Custom Fields: Display asset data directly within Jira issues for context.
- Automation: Keep inventory updated and trigger actions based on changes.
- Discovery Tools: Automatically scan your network for assets and populate your database.
Getting Started with Jira Service Management Assets
Step 1: Create an Object Schema
Object schemas serve as the foundation of your asset database. To create one:
- Navigate to Assets at the top menu in Jira Service Management.

- Click on Object Schemas > Create Object Schema.
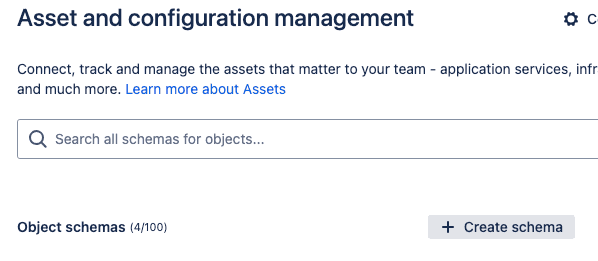
- Provide a name, unique key, and description.
Step 2: Define Object Types
Object types simply are similar grouped assets. For example, we’re going to set employee hardware objects:
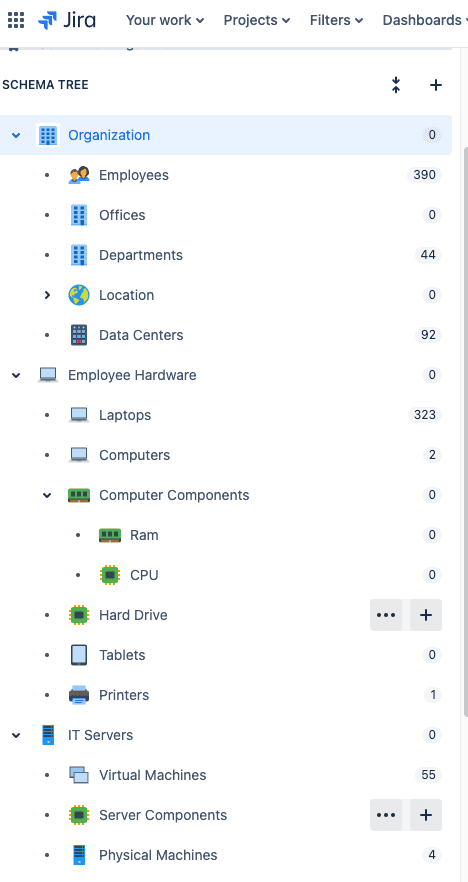
- Click the + sign next to Schema Tree to the left to create a new object type.
- We’ll give the object type the name of Employee Hardware.
- Choose an icon but leave the Parent blank.
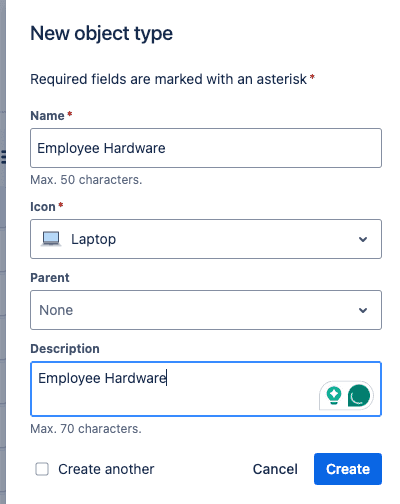
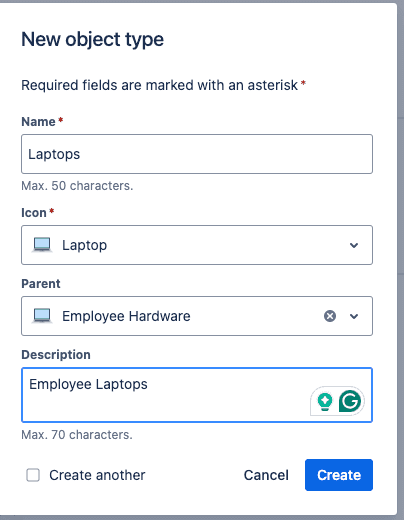
- Create a new object type again. The name is Laptops.
- Choose an icon.
- The parent will be the Employee Hardware object type we just created.
- Set a description and click Create.
Step 3: Create Attributes
Before you create the objects, ask yourself what attributes you need to track. Attributes like serial numbers, purchase dates, and warranty information can be comprehensive for tracking purposes.
Adding attributes is very simple. Within your Object tree, click the newly created Laptops Object.
Next, you will click the Attributes tab.
To create attributes, simply start typing the information into the fields.
- Create a Name for the attribute
- Description (optional)
- Type (To start this, maybe use the default).
- Type Value. There are lots of options to choose from here.
- Are there any additional values?
- Click Create.
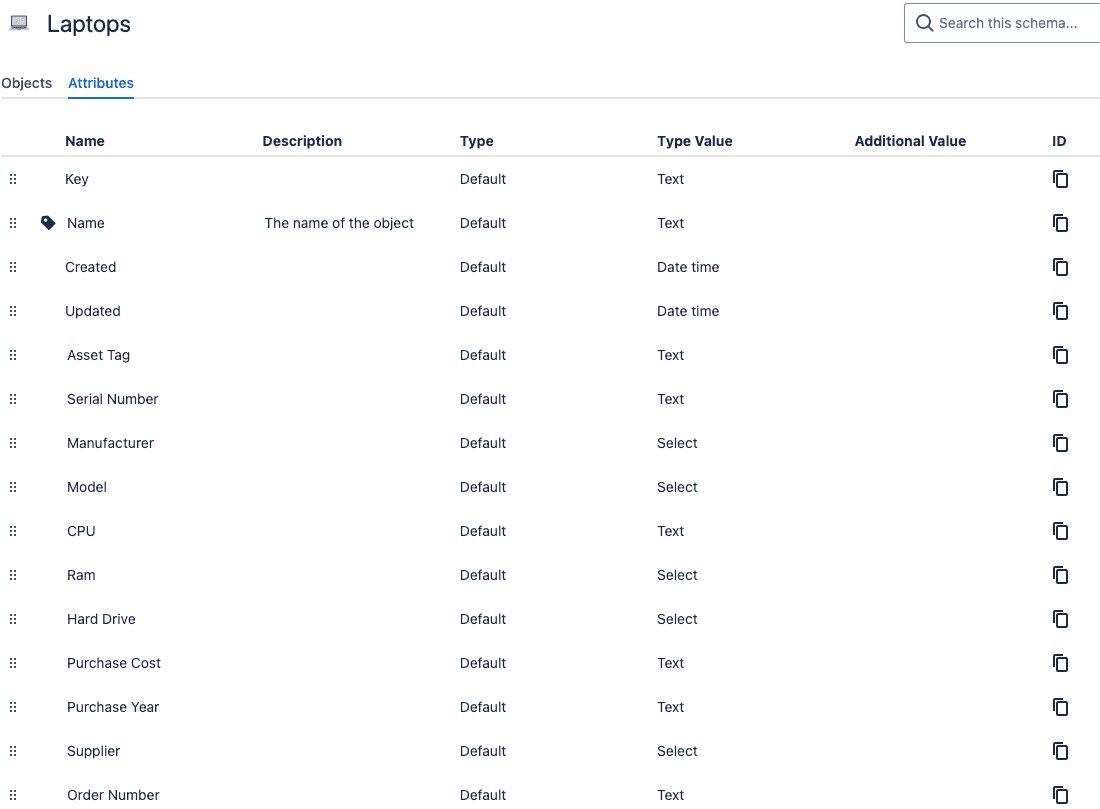
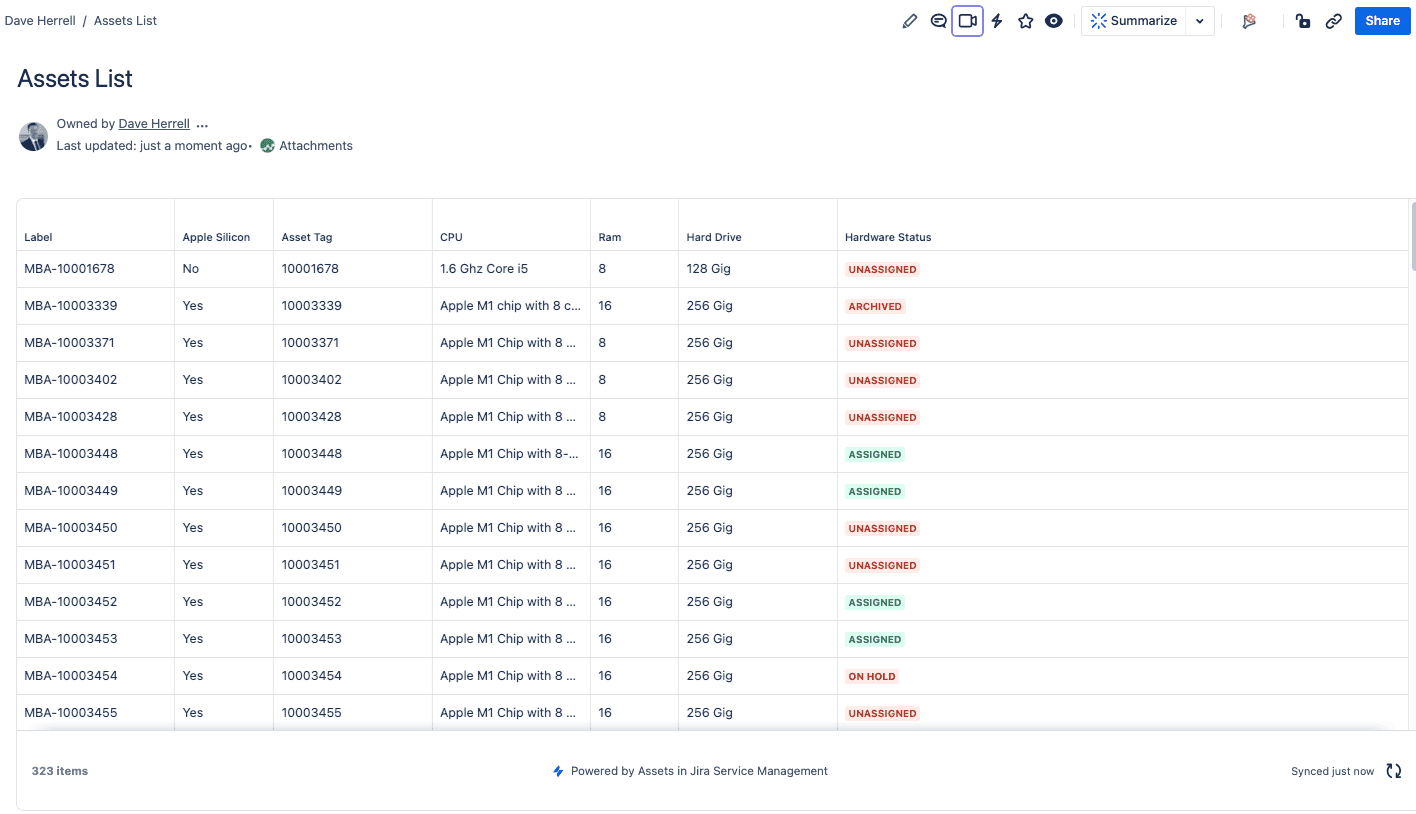
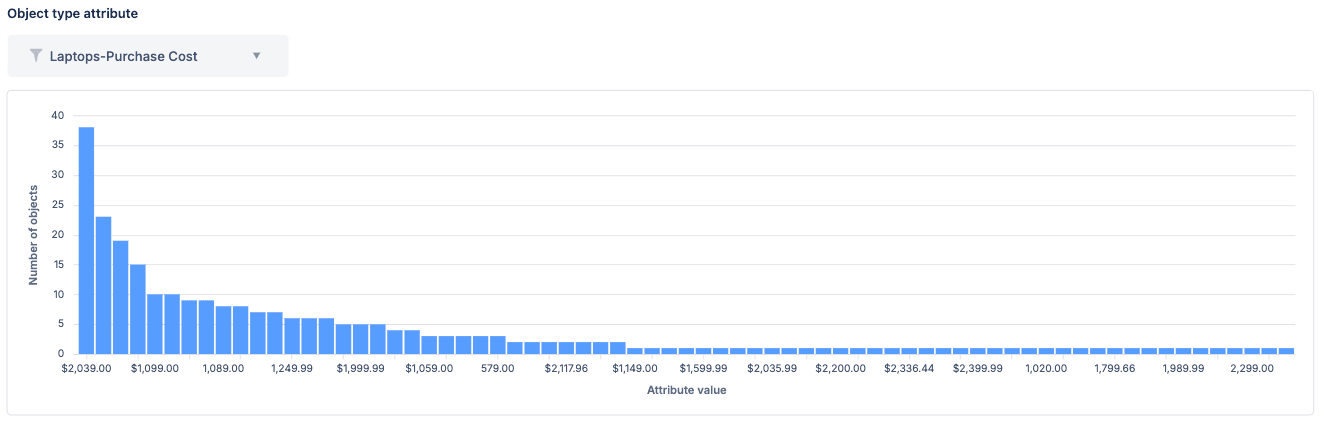
Some example attributes for laptops are model, CPU, RAM, hard drive, purchase cost, purchase year, etc. Here is an example of the attributes I’ve set for our Laptop Object:
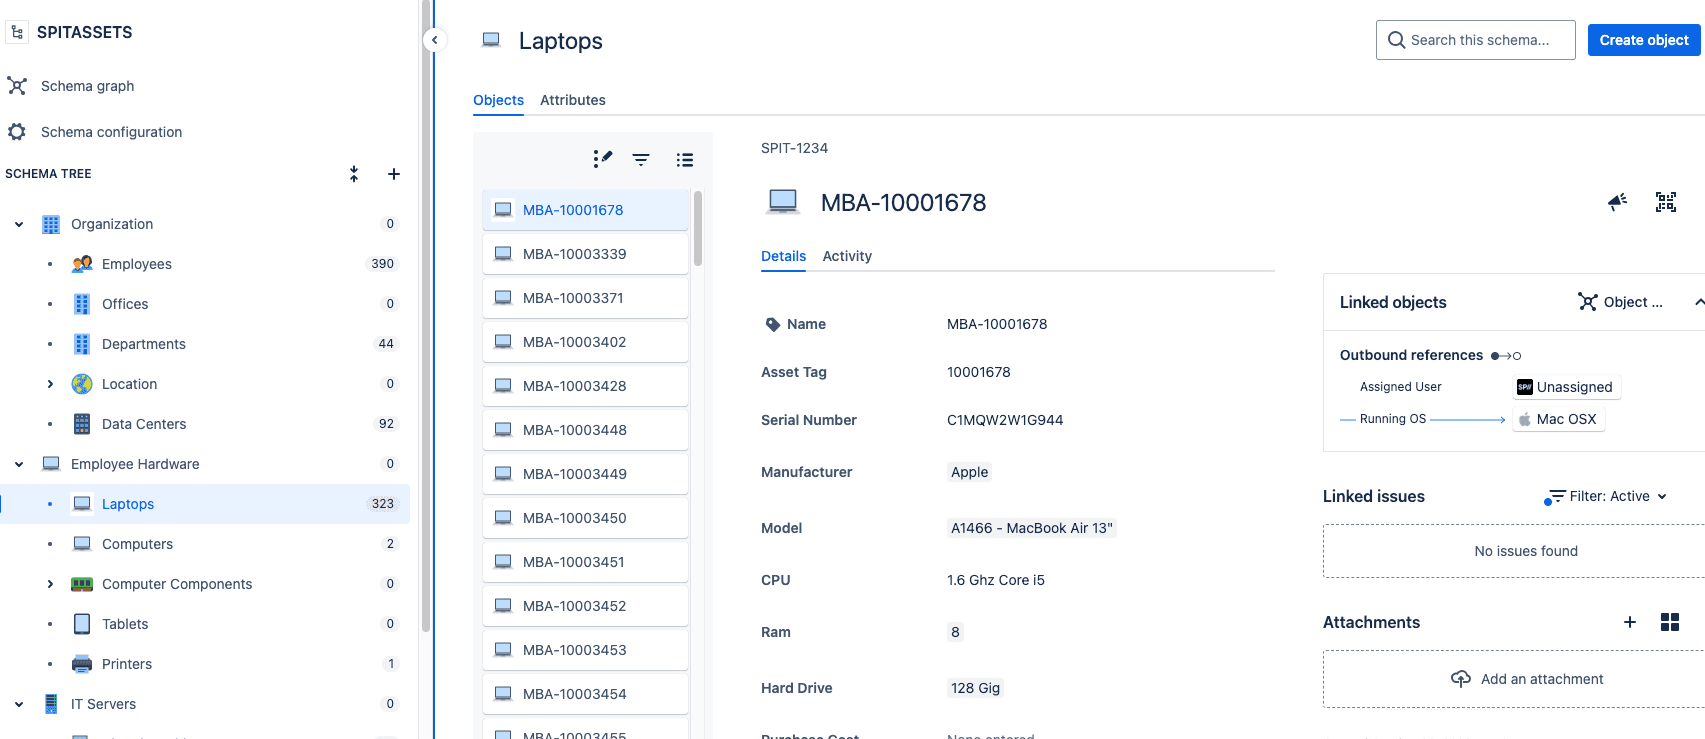
Step 4: Create Objects
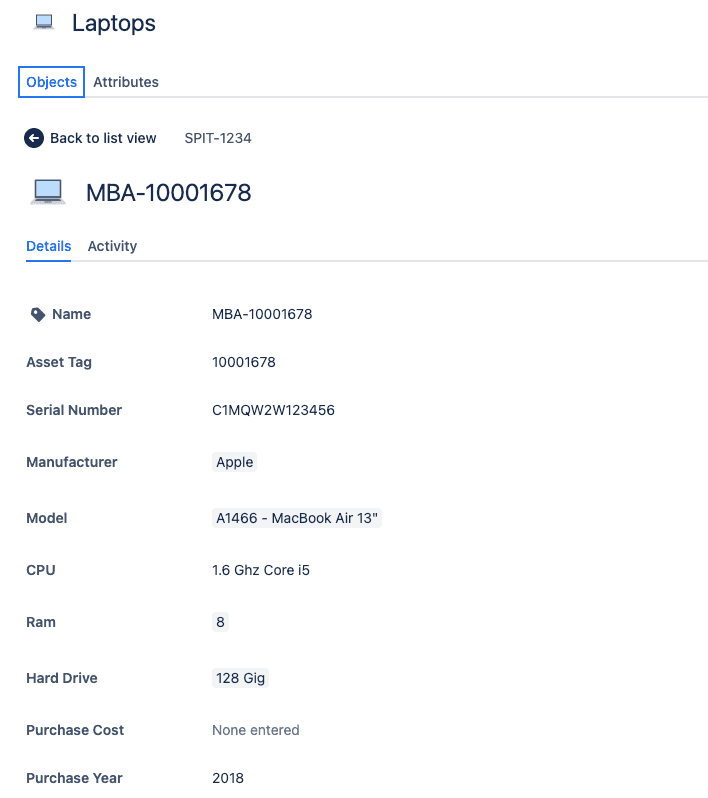
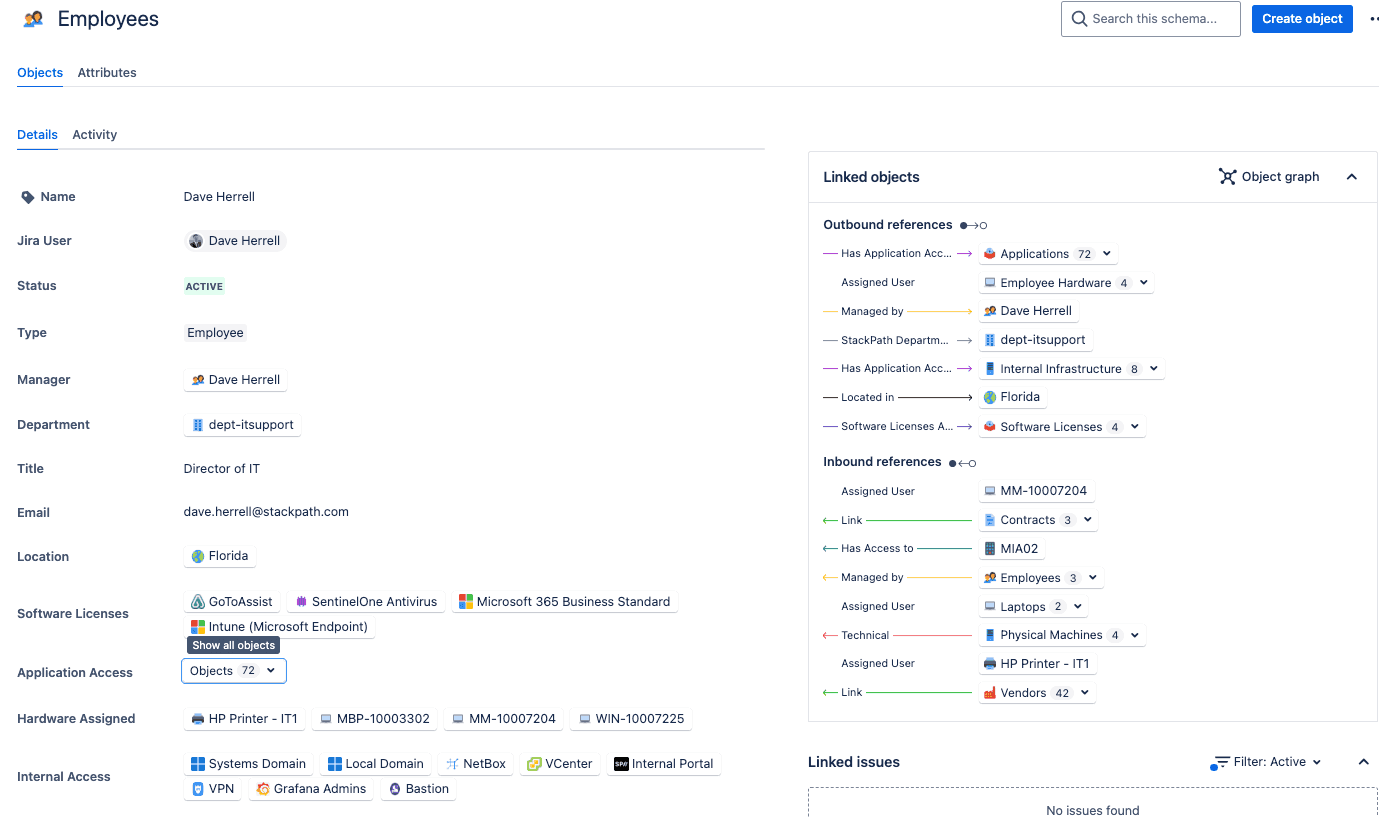
Now, you can populate your schema by creating objects. Each object represents an individual item; in our example, that would be a laptop.
- Click Create object in the top right.
- Fill out the attributes and information accordingly.
- Click
You should now have your first laptop object!
Bulk Import Data
You can also use CSV, JSON, or discovery tools to bulk-import data into your schema. Map data manually or automatically for seamless integration.
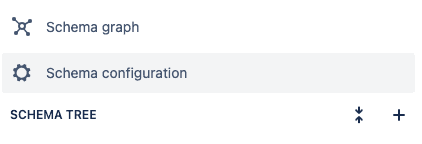
- To do this, click the Schema Configuration to the left
- In the next screen, choose Import. Then Click Create Import.
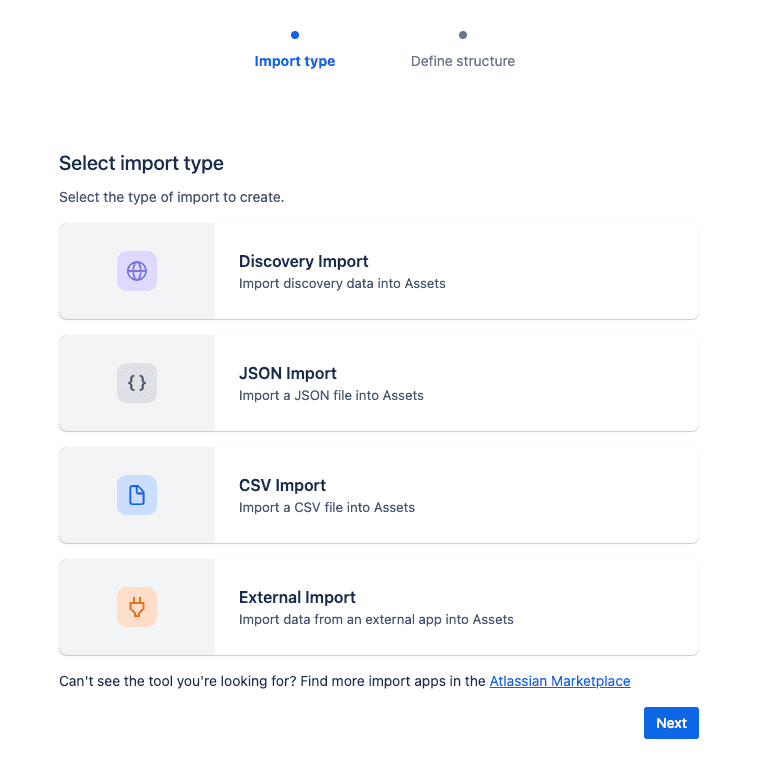
- Choose your import type:
- Discovery Import
- JSON Import
- CSV Import (most straightforward).
- External Import
The next step is to import your data. This will significantly reduce the time and effort required to create many objects manually. Using another asset platform, you can export your items to a CSV file and import them directly into Jira Assets. I highly recommend testing your bulk upload or bulk update using your JSM Sandbox before uploading to production.
Best Practices for Effective Management
Start Small
Focus on a few essential services or asset categories initially. This approach ensures a manageable workload and better learning opportunities as your database grows.
Utilize the Sandbox
If you organization pays for Sandbox capability, this is the best place for testing various Asset abilities before implementing them within production.
Use Templates
Leverage Jira’s predefined templates to set up your schemas quickly. Templates align with best practices and ensure consistency across teams.
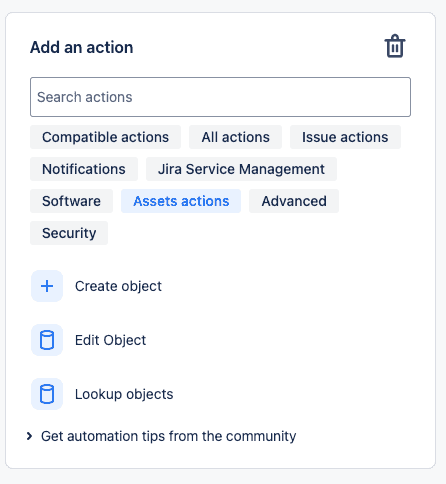
Automate Routine Tasks
Use Jira automation rules to:
- Update ownership when an asset is assigned.
- Notify teams about expiring licenses or warranties.
- Trigger service requests based on asset changes.
Integrate with Confluence
Enhance collaboration by embedding Assets data in Confluence pages. Use the Assets macro to create dynamic reports and share them with stakeholders.
Unlock New Insights with Reporting
Assets’ reporting capabilities allow teams to:
- Analyze inventory and usage trends.
- Monitor asset lifecycles.
- Assess data accuracy and completeness.
Empower Your Teams with Better Visibility
Jira Service Management’s Assets tool empowers your organization to:
- Centralize asset and configuration data:
- Create a single source of truth for all your IT assets, including hardware, software, and network devices.
- Store critical information such as purchase dates, warranties, maintenance contracts, and vendor details.
- Organize assets into logical groups based on location, department, or business unit.
- Improve decision-making with real-time insights:
- Gain visibility into your IT asset inventory and usage patterns.
- Identify potential risks, such as expiring warranties or software licenses.
- Optimize resource allocation and procurement decisions.
- Track asset lifecycle stages, from acquisition to disposal.
- Simplify audits and compliance reporting:
- Automate the collection and analysis of asset data.
- Generate comprehensive reports to meet regulatory and internal audit requirements.
- Quickly identify and address compliance gaps.
- Streamline the audit process and reduce manual effort.
Whether you’re embarking on your ITAM journey or seeking to refine your existing processes, Jira Service Management offers the flexibility and scalability to meet your unique needs.
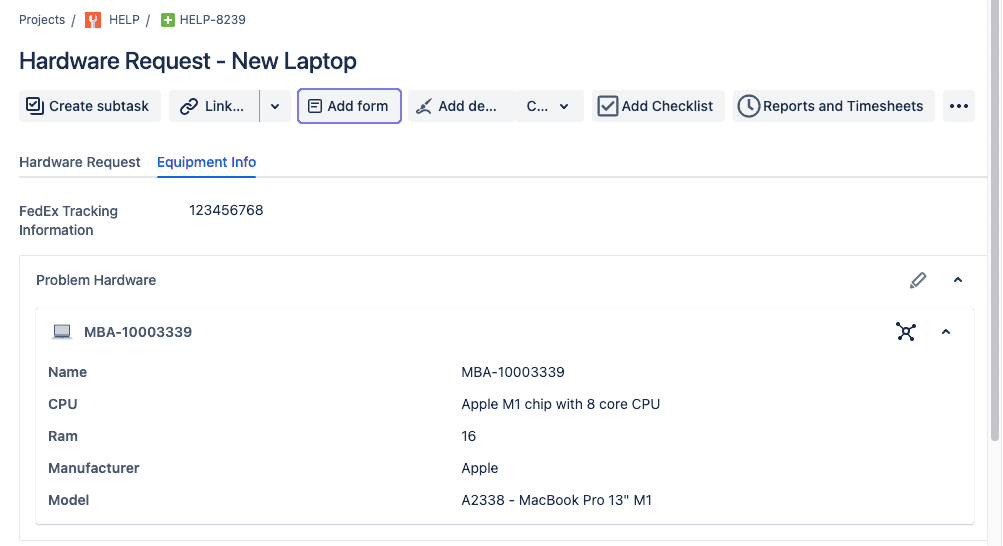
I plan on diving deeper into how you can utilize JSM’s Asset function with your Jira tickets and automation, as well as even using attributes within your objects to trigger Jira Automation to pull current data about those objects into a ticket fields. An example would be the current enrollment and health of a Microsoft Intune laptop.
I hope you found this helpful!
![]()