

Jira Cloud: Issue Creation and Commenting with Email
Jira Cloud can be configured to automatically create issues or add comments and attachments based on incoming emails from licensed users. This streamlines workflows and reduces manual effort.
Let’s set up an incoming email for the ticket within Jira. To do this, you must have permission the Jira Administrator permission.
To start, within Jira, click the cog wheel in the top right and choose System.
Once you are in the System settings, scroll down the options on the left to Mail, and under Mail, choose Incoming Mail.
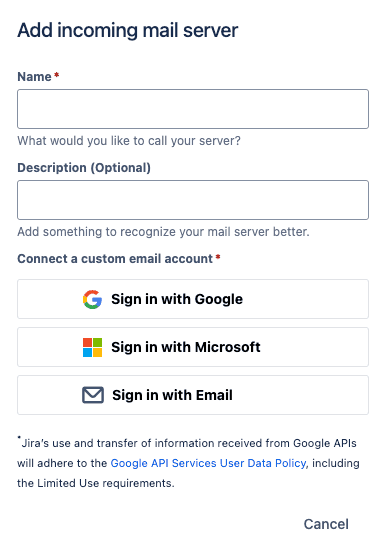
Choose Add Incoming Mail Server at the top of the Incoming Mail page. This will pop up options for you to choose from. You can select from Gmail, Microsoft integrations, or basic authentication using POP/IMAP. It’s highly advised to use Google or Microsoft for security reasons. It utilizes OAuth 2.0 for the authentication.
To configure Google or MS365, choose the email account option:
- Give your mail server a name and description.
- Select Sign in with Microsoft.
- Enter your Microsoft or Google credentials to use your mail server.
Jira will auto-fill authorization and the token endpoint data for Microsoft mail servers. You must review and confirm permissions to let Jira access your information. In some cases, your MS365 global administrator will need to approve this.
For custom servers using IMAP or POP:
- Choose the Sign in with Email option.
- Give your mail server a name and description, and click Add.
- Select the protocol, and enter the hostname, port number, timeout, username, and password fields.
- Click Add.
Now that you have the email servers connected, we need to tell Jira what to do with emails as they come into the mailbox. This is where your Mail Handler does.
To set up your incoming mail handler, click the add option at the bottom of Mail Handlers.
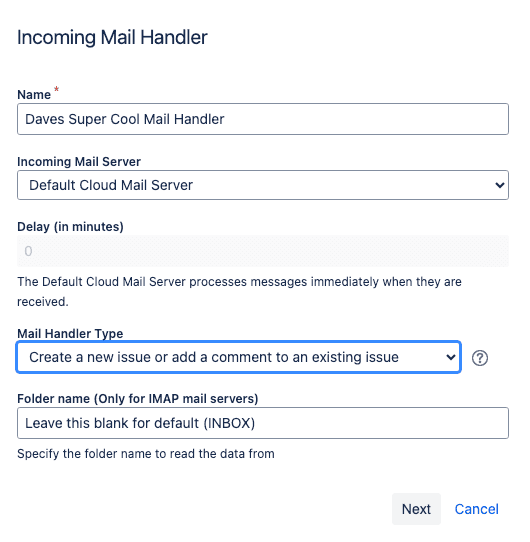
- Next, you need to give your handler a Name.
- Choose the Incoming Mail Server you just set up.
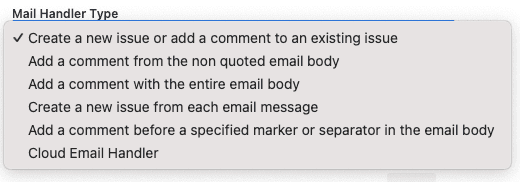
- Choose the option you want for Mail Handler Type. By default, Creating a new issue or adding a comment to an existing ticket is chosen. That’s the typical type used. However, you have a few options based on your team’s workflow.
- Lastly, you can choose the folder name if you are using IMAP.
- Click next.
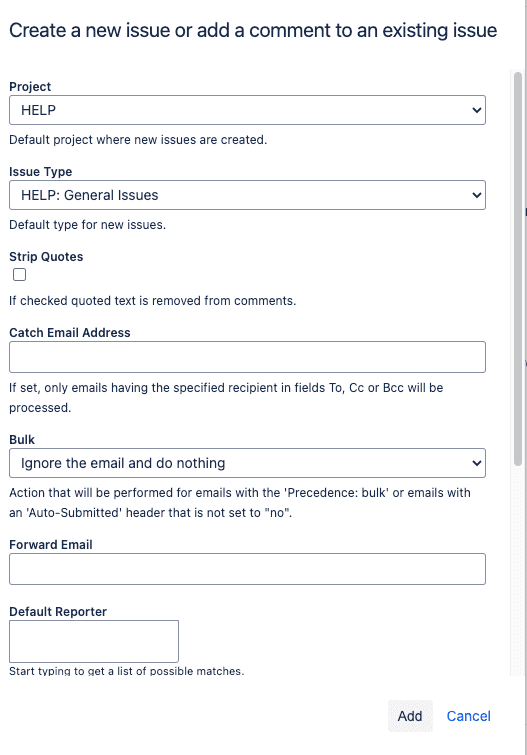
We’re ready to set up the rules.
- Choose the Jira or JSM Project where the issues wish to be created.
- Select the Issue Type.
- Choose the default reporter. If you are using Jira, this has to be a licensed user. If you don’t choose a default reporter, emails received from an unidentified address will simply be ignored.
You can choose from a few other options, depending on your needs. You can leave most of these blank or with their default selection if you set things up for the first time. You can always go back and change things.
- Once complete, choose Add.
When you receive an email in the email box you set up, it will automatically create a ticket within the project for you. When someone. Replies to an email that made a ticket. Jira will strip the contents and post only the repose as a comment on your ticket!
Based on your conditions, you can now set up various automation to label, re-assign the ticket, etc. An example is the Vendor outage alert automation we discussed here.
I hope you found this helpful!
![]()