

Jira Cloud: Utilizing Security and Permissions
Managing security and permissions in Jira Cloud is essential to safeguard data, protect sensitive information, and ensure efficient project workflows. This guide walks you through setting up permissions, roles, and security schemes in Jira Cloud, along with best practices for maintaining secure and organized access to project resources.
Understanding Jira Cloud Security Structure
Jira Cloud offers multiple levels of security configurations:
- Global Permissions: Define access at the system level across all projects.
- Project Roles and Permissions: Control access and actions within specific projects.
- Issue Security Levels: Protect individual issues based on sensitivity.
It’s essential to configure these correctly to align with your organization’s security and operational needs.
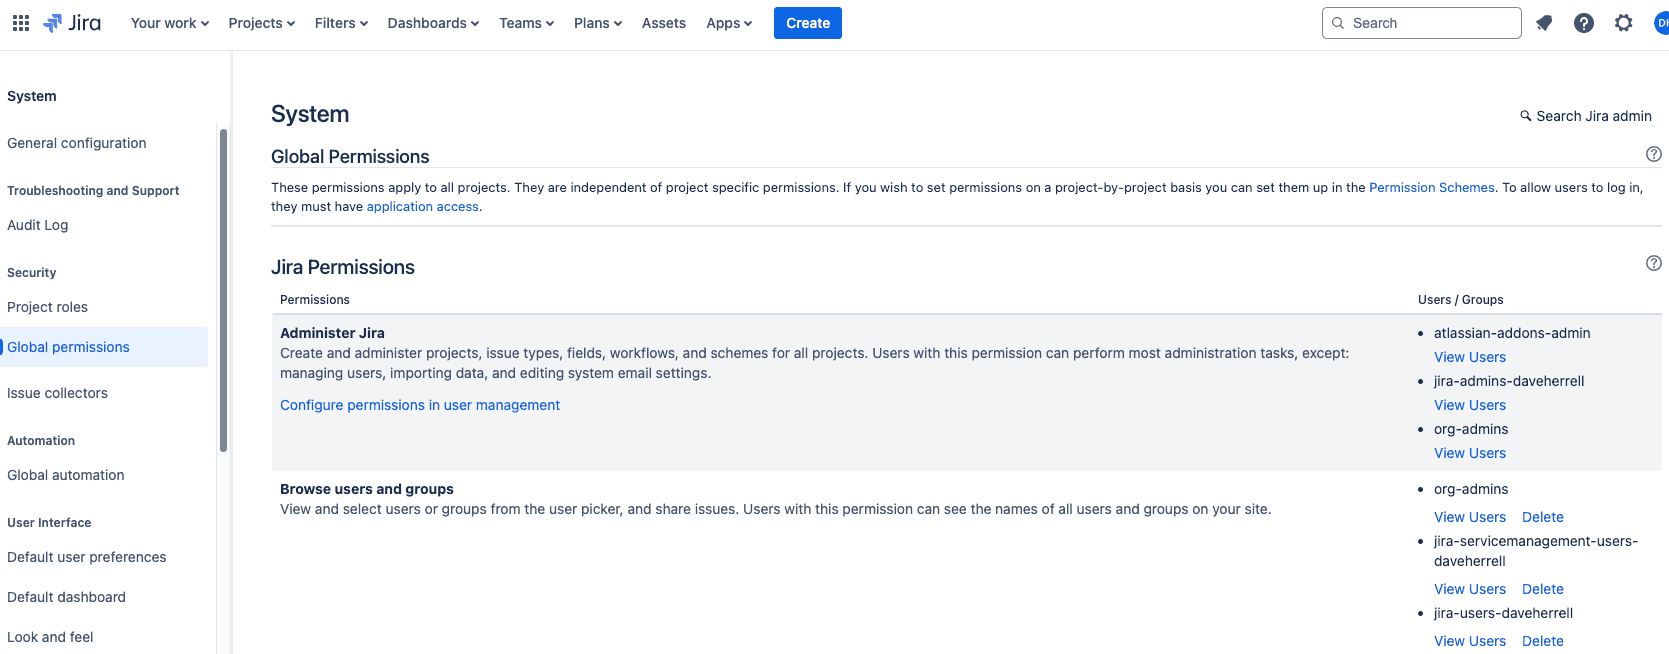
Setting Up Global Permissions
Global Permissions control access to high-level Jira functionalities that impact all users:
- Administration: Only assign Jira admins to this role to avoid unintended changes.
- Browse Users and Groups: Enable this for teams that need access to user lookup (e.g., project managers, team leads). Users with this permission can see the names of all users and groups on your site.
- Manage Group Filter Subscriptions: Limit this to prevent excessive notifications or misuse of shared filters.
- Share dashboards and filters: Allows user to share dashboards and filters with other Jira users.
- Make bulk changes: Assign this with caution. This gives access to modify collections of issues at once. Example closing multiple tickets at once.
- Create team-managed projects: Give users the ability to create projects separate from shared configurations and schemes. Team-managed projects don’t affect existing projects or shared configurations like workflows, fields or permissions.
Best Practice Tips:
- Assign Global Permissions sparingly. Limit to trusted users or groups, such as Jira administrators or senior managers.
- Regularly audit global permissions to ensure they remain appropriate as your organization scales.
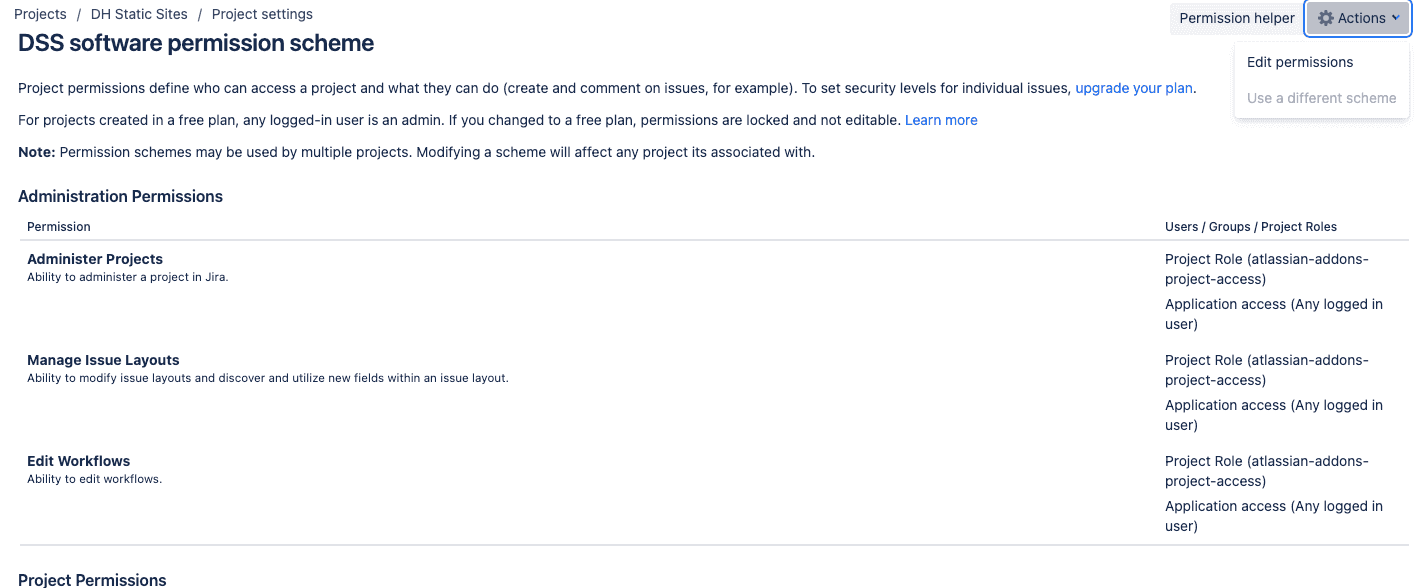
Configuring Project Roles and Permissions
Project Permissions define what users can do within a specific project. Here are only a couple examples:
- Administer Projects: Reserved for users responsible for project configurations.
- Browse Projects: Needed by all team members to view project information.
- Edit Issues, Assign Issues, Resolve Issues: Define responsibilities based on user roles such as developers, testers, and project leads.
Steps to Edit Project Permissions:
- Navigate to Project Settings -> Permissions.
- Click Actions on the top left -> choose Edit Permissions to edit the Project permission scheme. You may need an administrator to do this.
Best Practice Tips:
- Use project roles instead of individual users for permissions. This simplifies administration and allows easier role reassignment.
- Avoid granting “Administer Projects” to large groups to minimize configuration changes.
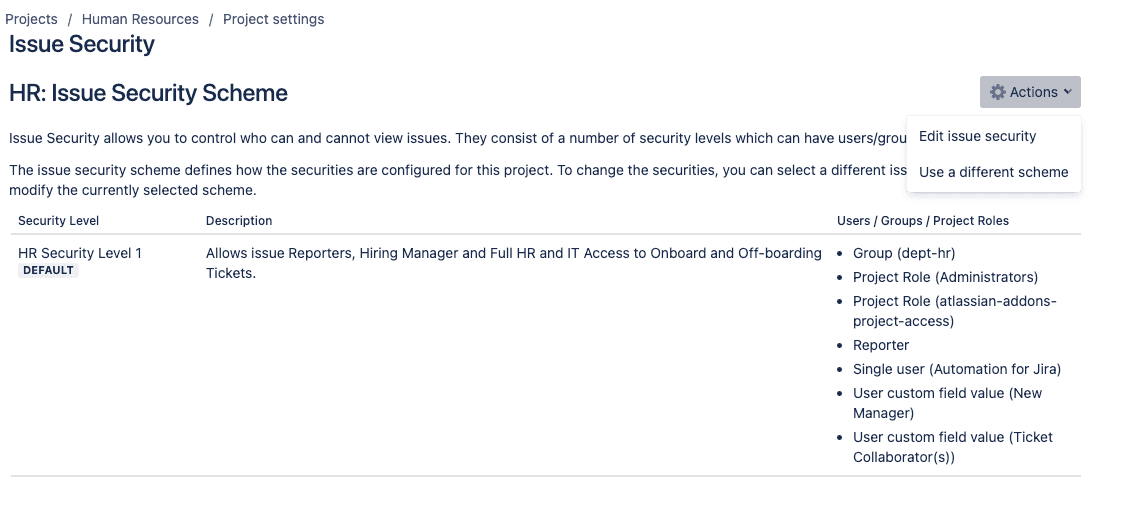
Designing Issue Security Schemes
Issue Security Schemes help restrict access to certain issues within a project. This is particularly useful for sensitive information, such as HR cases or high-priority support tickets.
Steps to Set Up Issue Security Levels:
- Go to Project Settings -> Issues -> Security.
- If an Issue Security Scheme has not been created for the project, ask your Jira administrator to create and link one to the project. Choose Edit issue security.
- Create Security Levels (Example: Confidential, Internal, Public).
- Assign Users, Groups, or Roles to each security level.
- In our example below, we create an HR Security Scheme that allows issue Reporters, Hiring Manager and Full HR and IT Access to Onboard and Off-boarding Tickets. This only gives them access to the tickets they report, tagged within a custom field or linked as the persons manager.
Best Practice Tips:
- Use issue security levels to segment sensitive data based on the need-to-know principle.
- Assign security levels at issue creation to avoid manual reassignments later.
- Please educate users on how to apply security levels to ensure consistent usage.
Managing User Roles and Access Rights
Proper role assignment is critical to efficient permission management:
- System Admin Role: Assign to trusted personnel responsible for Jira administration.
- Project Admin Role: Limited to those managing specific projects.
- Collaborator Roles: Design roles like “Developer,” “Reviewer,” and “Viewer” based on typical user responsibilities.
Best Practice Tips:
- Regularly review role assignments to ensure users have the appropriate access for their responsibilities.
Use groups and roles in tandem for flexibility across different projects.
Auditing Permissions and Security Settings
Periodic audits help maintain a secure Jira environment and prevent unauthorized access.
Audit Checklist:
- Verify that Global Permissions align with the current team structure.
- Ensure Project Permissions are consistent across similar projects.
- Review Issue Security Levels to confirm they’re applied correctly.
- Decommission unused accounts and revoke access for former team members. Better yet, utilize Atlassian Guard to revoke access based on SCIM with your user provider such as Azure Entra or Active Directory.
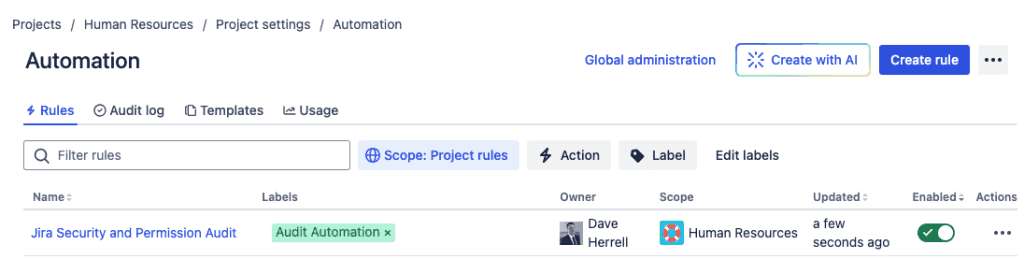
Automating Audits:
- Use Jira Automation to create audit tickets as a reminder for a person(s) to review security permissions and edit if needs be.
Automating Permissions Management with Jira Cloud Automation
Jira Cloud’s automation capabilities can help streamline permissions and security management:
- Onboarding and Offboarding: Automate user addition and removal from project roles.
- Custom Notifications: Trigger alerts when sensitive permissions are modified.
- Issue-Level Security: Auto-apply security levels based on issue type or content keywords.
Best Practice Tips:
- Document and test all automation rules before applying them broadly.
- Regularly review automation logs for unexpected behavior or updates.
Additional Tips for Enhancing Jira Security
- Enable Two-Factor Authentication (2FA): Enforce 2FA for Jira admins and high-access roles. .
- Use Managed Accounts: Integrate with an Identity Provider (example: Azure Entra, Active Directory) to centralize authentication.
- Utilize SCIM: Allow SCIM connected to your IDP to create or revoke access to each Atlassian product and projects as needed through your IDP. Allowing less work for your Jira Administrator and IT Support Teams.
- Educate Users: Offer training to ensure users understand permission and security configurations.
You can enhance Jira Cloud security without compromising user experience. Implement best practices for global permissions, project roles, and issue security schemes to balance access control with productivity. Automate routine tasks and prioritize regular audits and user training to ensure a secure and efficient workflow.
I hope you find this helpful!
![]()